Image Transformations
Use transformations to resize, crop, convert, or adjust an image. Supply the parameters below when you:
- Request an on-demand variant through the Fetch Asset API
- Define a variant profile
- Preprocess an upload
- Configure eager variant generation
Use the same parameter names in request URLs, variant profiles, and upload preprocessing configuration. For older configurations and URLs, see Migrating from abbreviated parameters.
Parameter Reference
| Parameter | Name | Description | Allowed Input | Default |
|---|---|---|---|---|
height | Height | The target height of the image | Integer > 0 | null (Preserves aspect ratio) |
width | Width | The target width of the image | Integer > 0 | null (Preserves aspect ratio) |
fit | Fit Mode | Controls how the image fits into the bounding box defined by height and width | fit, fill, stretch, crop | fit |
gravity | Gravity | When cropping occurs, determines which part of the image is retained | center, entropy, attention | center |
format | Format | The output format of the image | Format | Original format |
rotate | Rotate | Rotates the image clockwise. auto uses EXIF data | 0, 90, 180, 270, auto | 0 |
flip | Flip | Flips the image along an axis | v (vertical), h (horizontal), none | none |
filter | Filter | Applies a visual effect | none, black_white, grayscale, sepia | none |
blur | Blur | Applies a Gaussian blur (value is sigma) | 0 - 150 | 0 |
quality | Quality | Compression level for lossy formats | 1 - 100 | Format dependent (e.g., 80) |
pad | Padding | Adds padding pixels to the image boundaries | Integer > 0 | 0 |
pad-color | Pad Background | The padding background color | Hex Code (e.g., #FF0000 or #FF0000FF) | Transparent / White (Format dependent) |
strip | Strip Metadata | Comma-separated list of metadata fields to remove | exif, iptc, xmp (e.g., exif,xmp) | None |
color-space | Color Space | Transforms the image color space | origin, grayscale, srgb, p3 | origin |
pixel-channels | Pixel Channels | Channel selection and order for raw pixel output | Any permutation of RGB or RGBA, or gray (case-insensitive) | RGB |
pixel-layout | Pixel Layout | Sample arrangement for raw pixel output | interleaved, planar | interleaved |
Format
| Format | Name | File Extension | Content Type |
|---|---|---|---|
png | PNG | .png | image/png |
jpg | JPEG | .jpeg | image/jpeg |
webp | WEBP | .webp | image/webp |
avif | AVIF | .avif | image/avif |
jxl | JPEG XL | .jxl | image/jxl |
heic | HEIC | .heic | image/heic |
gif | GIF | .gif | image/gif |
pixels | Raw Pixels | .bin | application/octet-stream |
pixels supports output only. Upload an encoded image and request a pixel variant, or convert the upload to pixels
through preprocessing. See Raw Pixels.
Image Resizing
The height, width, and fit parameters determine the output dimensions and whether Konifer scales, crops, or
distorts the
source image.
The resizing examples use this 1365×1024-pixel cow photo. Download it to try the same transformations with your own Konifer instance. The examples on this page are saved outputs from the Konifer API.
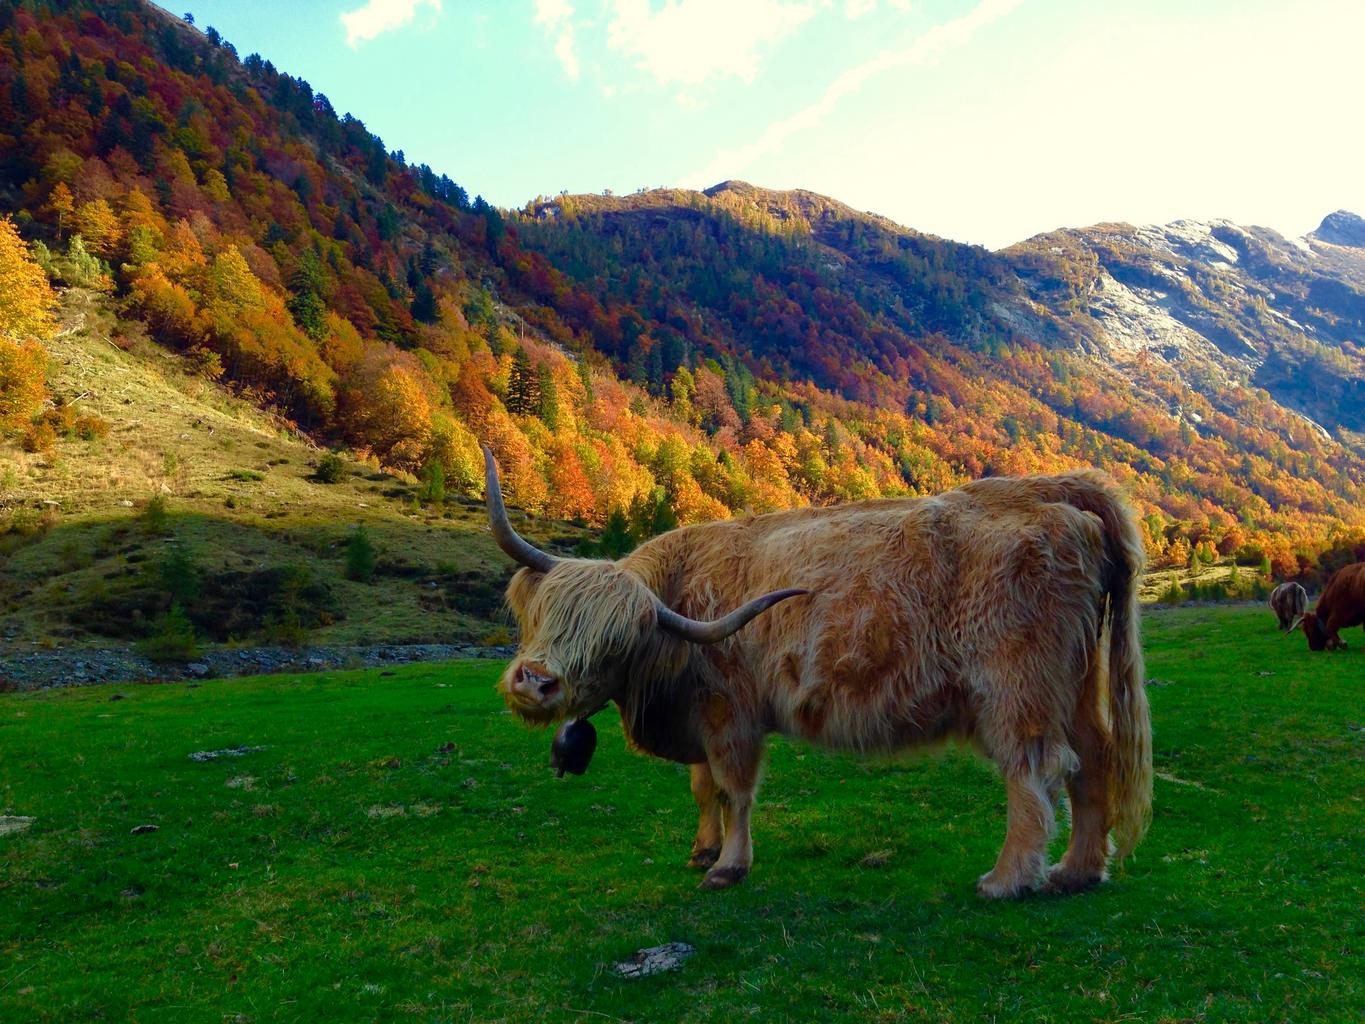
Source · 1365×1024 pixels. Download the cow photo
fit (Default)
Requirements: height or width (or both).
Konifer scales the image to fit within the requested dimensions while preserving its aspect ratio.
- With only
width, Konifer calculates the height from the source aspect ratio. - With only
height, Konifer calculates the width from the source aspect ratio. - With both, the output fits inside the requested bounding box. Neither dimension exceeds its requested value, and no cropping occurs.
fill
Requirements: Both height and width are required.
Konifer scales the image until it covers the requested dimensions, preserving its aspect ratio, then crops any overflow. The output matches the requested width and height.
Use gravity to choose which part of the scaled image remains. The default, center, removes an equal amount from
opposite
sides when possible.
stretch
Requirements: Both height and width are required.
Konifer scales the image to the requested width and height without preserving its aspect ratio.
The output may appear squashed or stretched when the requested aspect ratio differs from the source.
crop
Requirements: Both height and width are required.
Konifer removes pixels from the source to produce the requested width and height. Unlike fill, crop does not scale
the image before cropping. Use gravity to choose which part of the source remains.
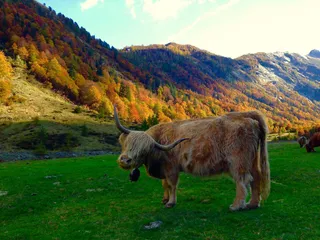
All four requests below use width=320&height=320&format=webp. Compare how much of the pasture remains and whether
the cow keeps
its proportions. The outlined frames mark the same 320×320 target box; the empty space around the fit result belongs
to this page, not the returned image. Select a caption to inspect the output at its native size.
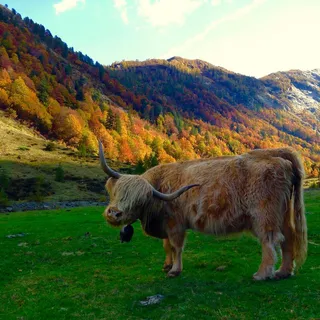
fit=fill · 320×320 pixels · Scaled, then cropped
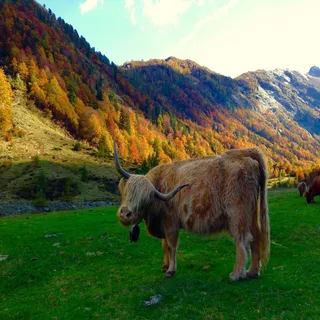
fit=stretch · 320×320 pixels · Changed proportions
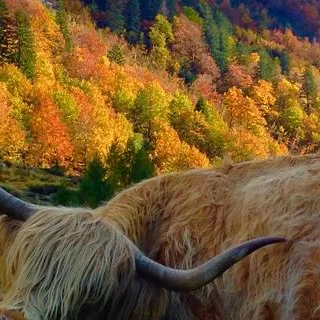
fit=crop · 320×320 pixels · Cropped at source scale
For example, after uploading the photo at /documentation/cow, request the filled square with:
GET /assets/documentation/cow/-/content?format=webp&width=320&height=320&fit=fill
Gravity Options (gravity)
Both fill and crop support these gravity values:
center(default): Keeps the geometric center of the image.entropy: Keeps the area with the most detail, measured through contrast and edges. It often works well for landscapes, products, and textured objects.attention: Keeps the area that the saliency model identifies as visually important, including faces and human features. It often works well for profile pictures and social content.
These portrait crops use the same bird photo and
width=240&height=320&fit=fill&format=webp. Only gravity changes:
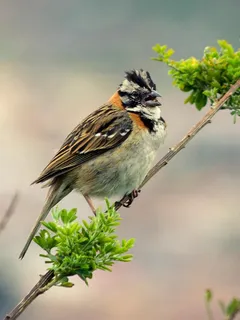
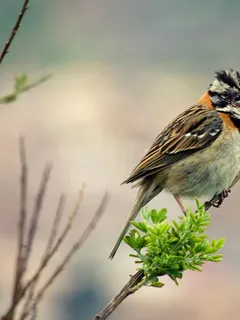
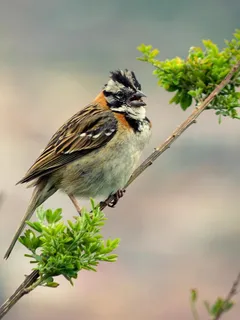
gravity=attention · Salient region
The entropy crop clips the bird's head in this example. Automatic gravity uses visual heuristics; it does not guarantee
that a whole subject remains in frame. Compare results with representative uploads before choosing a default.
Image Formats & Quality
Konifer can return variants in these formats:
- JPEG
- PNG
- WEBP (single and multi-page)
- AVIF
- JPEG XL
- HEIC
- GIF (single and multi-page)
For raw image buffers, Konifer also supports Pixels (format=pixels).
Quality (quality)
The quality parameter controls compression for lossy formats. Lower values reduce file size and discard more
image detail.
Higher values preserve more detail and require more storage and network bandwidth.
| Format | Default Quality | Notes |
|---|---|---|
| JPEG | 80 | Good balance for photos. |
| WEBP | 80 | Generally 30% smaller than JPEG at equivalent quality. |
| AVIF | 50 | Superior compression, but computationally expensive to encode. |
| PNG | N/A | PNG is lossless. The quality parameter is ignored. |
| JPEG XL | 90 | High-efficiency modern standard. |
| HEIC | 50 | Standard for iOS captures. |
| GIF | 100 | Images are generally small due to a limited color palette. |
| Pixels | N/A | Raw samples have no compression; Konifer ignores quality. |
Defaults are based on the Sharp library recommendations.
Higher quality settings can increase encoding time. AVIF encoding is especially sensitive to this setting.
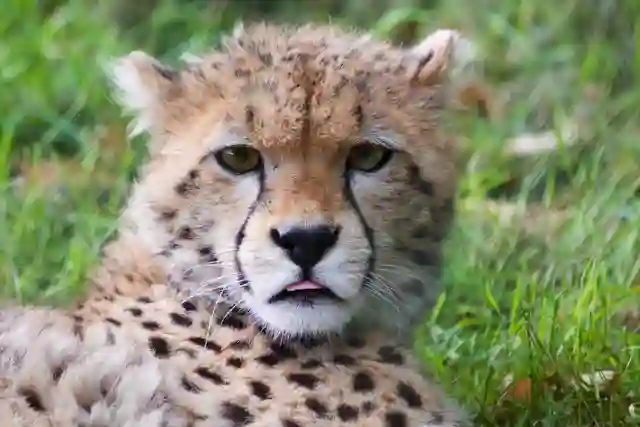
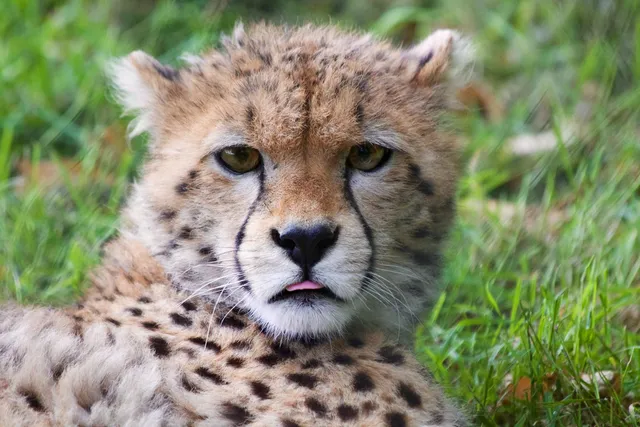
Both versions of this cheetah photo use width=640&format=webp.
Compare the fur around the eyes: quality=10 loses fine detail in exchange for a smaller file. Open each output at
its native
640×427 size to inspect the difference. These file sizes apply to this photo and these settings.
Raw Pixel Output
format=pixels returns packed, row-major, unsigned 8-bit samples (uint8, 0–255), without an image header or metadata.
The response has content type application/octet-stream and the download extension .bin. Animated sources produce
the first frame. Apply resizing, rotation, filters, and padding before exporting the buffer.
Pixel Channels (pixel-channels)
Specify any permutation of RGB or RGBA, or gray. Input is case-insensitive; Konifer reports channels in lowercase
in response attributes. Color channels must contain R, G, and B once each, with an optional single A.
Examples include RGB (default), BGR, RGBA, BGRA, and ARGB. Invalid values, such as RRB or RG, return
400 Bad Request.
Color channels require an output color space of srgb or p3. Use color-space=srgb or color-space=p3 if the
original color space
is unsuitable. With color-space=origin, a grayscale, CMYK, or other unsupported source color space returns
400 Bad Request.
An A channel preserves source alpha or contains 255 if the source has no alpha. Color output without A drops
alpha. gray returns one grayscale channel and composites transparency against white. For gray, omit
color-space or use
color-space=origin or color-space=grayscale; an explicit color-space=srgb or color-space=p3 returns
400 Bad Request.
Pixel Layout (pixel-layout)
| Value | Arrangement for RGB | Default |
|---|---|---|
interleaved | All channels per pixel: R1 G1 B1 R2 G2 B2 … | Yes |
planar | A complete plane per channel: R1 R2 … G1 G2 … B1 B2 … | No |
Both layouts follow row order within the image. Channel and plane order follow pixel-channels. For gray, Konifer
normalizes the layout to interleaved, including requests for planar.
Pixel options apply when the resolved output format is pixels. They do not select that format on their own and have
no effect on encoded output such as PNG. Select pixels through format=pixels or a profile that defines it;
Accept: application/octet-stream does not select pixel output.
Read the output dimensions and pixel attributes (channels, layout, dataType) from the content response's
K-Attr-* headers, or from attributes in the client's
fetchContent() result. link also returns these attributes in JSON. The byte count is
width × height × channel count. The current output data type is fixed at uint8; there is no data-type
transformation parameter.
Use these same parameter names in variant profiles and preprocessing configuration. See Raw Pixels for configuration and Fetching raw pixels for HTTP and client examples.
Color Space
The color-space parameter controls the output color space and its available color gamut.
origin(default): Retains the embedded ICC profile, when present, without converting the color space.grayscale: Converts the image to a single-channel (or 2-channel if alpha exists) grayscale image. This is more space-efficient than thegrayscalefilter; however, color-adding transformations (such aspad-color) will also be flattened to grayscale.srgb: Converts the image to sRGB using its embedded ICC profile. Konifer removes the profile from the output because most displays assume sRGB by default.p3: Converts the image to the Display P3 profile, the standard for modern iOS-based cameras and wide-gamut displays.
Converting an sRGB or grayscale source to P3 does not create colors absent from the source. The conversion may increase file size without changing its appearance.
Geometry & Effects
Rotate (rotate)
Use rotate to rotate the image clockwise in 90-degree increments.
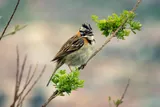
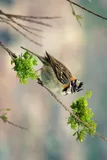
These small outputs use the same bird photo with
width=160&height=160&format=webp. Each image fits inside the same square frame. Follow the bird and its branch as
the photo
turns clockwise; 90° and 270° produce portrait images.
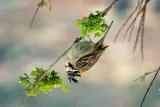
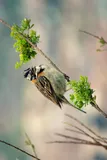
If auto is supplied, Konifer reads the EXIF Orientation metadata from the original variant and rotates the image
accordingly. The resulting transformed variant has the EXIF Orientation tag stripped to prevent double-rotation by
displays.
Flip (flip)
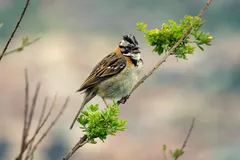
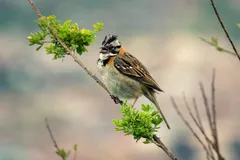
Use flip to mirror the image along an axis:
v: Vertical flip (top-to-bottom).h: Horizontal flip (left-to-right).
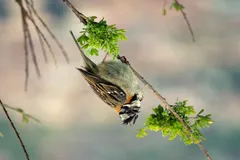
These examples use the same bird photo with width=240&format=webp. With flip=h, the bird faces the opposite
direction.
With flip=v, the top and bottom exchange places while the bird stays on the same side of the image.
Filter (filter)
Use filter to apply one of these effects:
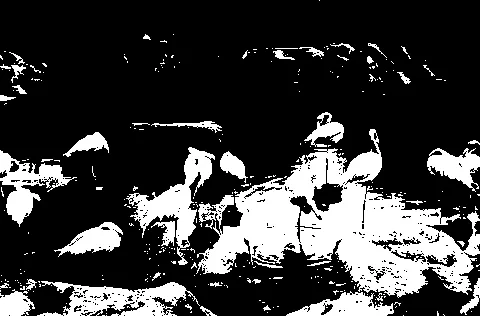
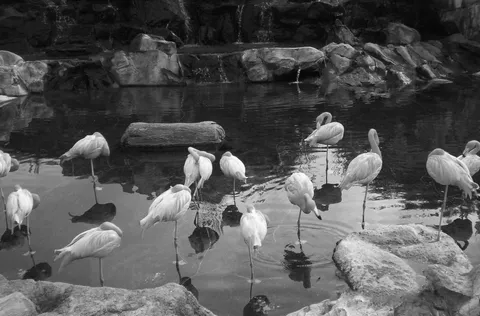
none(default): No filter applied.black_white: Applies a binary threshold so each pixel becomes pure black or pure white.grayscale: Removes color while preserving shades of gray.sepia: Applies a warm, brownish tone matrix (identical to the CSSsepia(100%)filter).
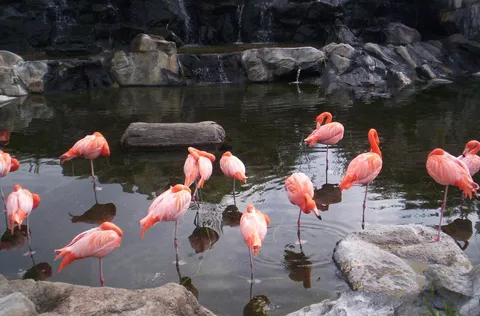
Each example below uses the same flamingo photo with
width=480&format=webp. Compare the solid black and white regions from black_white with the tonal detail retained by
grayscale.
filter=black_white · Binary threshold
filter=grayscale · Shades of gray
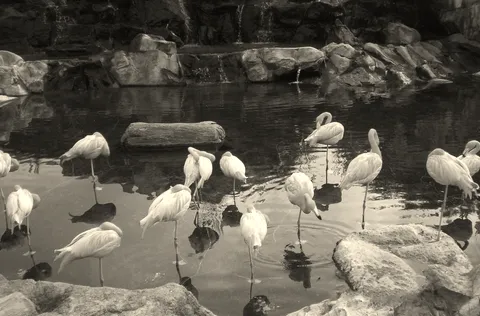
The grayscale filter is different from the grayscale color space (color-space). Images with this filter
applied will still
be 3-channel (or 4-channel if the image contains alpha). Other transformations, such as padding, will still retain
color.
For example: ?filter=grayscale&pad=10&pad-color=%23FF2900 produces a grayscale image with a red border. Encode
# as %23
in a URL.
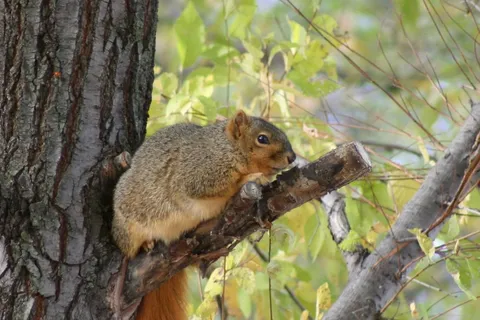
Blur (blur)
Use blur to apply a Gaussian blur. Higher values soften more detail. Konifer applies blur after resizing, so compare
values at the dimensions you plan to deliver.
Range: 0 (no blur) to 150 (heavy blur).
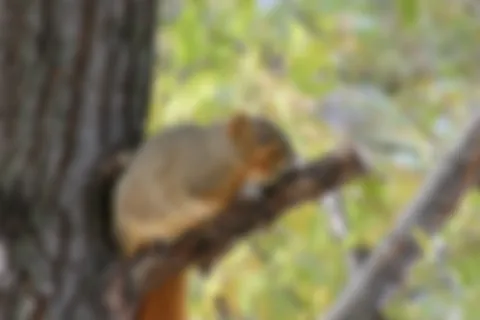
These outputs use the same squirrel photo with
width=480&format=webp. Only blur changes:
Borders & Padding
Use pad to extend each edge of the image canvas by a number of pixels.
Amount (pad)
Set the number of pixels added to each edge.
Padding Color (pad-color)
Set the padded area's color with a CSS-style hex value in pad-color.
- If
pad-coloris omitted: Padding is transparent for PNG, WebP, AVIF, JPEG XL, and HEIC. It is white for JPEG and GIF - Hex Format: Supports both RGB (Opaque) and RGBA (Transparent) formats.
Examples
- Solid Red:
pad-color=%23FF0000(URL encoded#FF0000) - Translucent Red (50% Opacity):
pad-color=%23FF000080(URL encoded#FF000080)
Both requests below resize the squirrel to 320×213 pixels, then add pad=16 on every edge. The final canvas measures
352×245 pixels. With WebP, omitting pad-color leaves the added area transparent; the checkerboard is this page's
background.
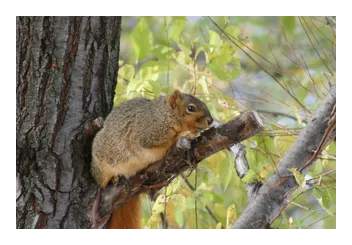
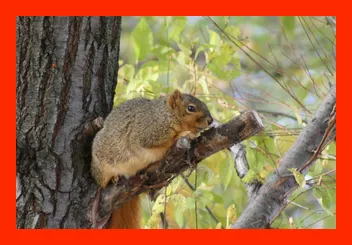
pad=16&pad-color=%23FF2900 · Solid color
GET /assets/documentation/squirrel/-/content?format=webp&width=320&pad=16&pad-color=%23FF2900
Metadata
Strip Metadata
Use strip to remove EXIF, XMP, or IPTC metadata from the output.
Add strip to a variant profile, eager variant, or preprocessing rule when every matching asset needs the same metadata
policy. Stripping metadata during preprocessing removes it from the original variant and every variant derived from it.
Migrating from abbreviated parameters
The current API uses descriptive transformation names. If you upgrade from a version that uses abbreviations,
replace these keys in request URLs, variant-profiles, and transform.preprocessing:
| Previous name | Current name |
|---|---|
w | width |
h | height |
q | quality |
g | gravity |
r | rotate |
f | flip |
cs | color-space |
pad-c | pad-color |
This is a breaking change: use the current names to request transformations. Konifer does not support the previous
names as aliases. Keep the parameter values, including flip=h and flip=v.
For example, change this request:
GET /assets/photos/123/-/content?w=256&h=256&fit=fill&r=auto&format=webp&q=80
To:
GET /assets/photos/123/-/content?width=256&height=256&fit=fill&rotate=auto&format=webp&quality=80
Names such as fit, format, filter, blur, pad, strip, profile, pixel-channels, and pixel-layout
keep their existing spelling. The URL signature parameter remains s.
Regenerate URL signatures after renaming parameters. Sign the updated path and query string, with parameters sorted by their new keys.
Prefix each label query parameter with label:, including names that overlap transformation parameters. For example,
use label:width=wide to filter by an asset label named width. Keep the label's key as width in upload and update
JSON. See label query parameters.